Featured Post

Desain Fasad Eksterior Rumah Mungil Cantik Minimalist

Desain Fasad Eksterior Rumah Mungil
Perkembangan dunia properti saat ini sangat pesat, hal ini ditandai dengan banyaknya pembangunan unit-unit properti, misalnya: apartemen atau kondominium eksklusif yang super mewah atau pembangunan rumah-rumah mungil yang sederhana.

Bersamaan dengan perkembangan dunia properti tersebut, kebutuhan masyarakat akan rumah belakangan ini sangat tinggi. Jika budget kurang mencukupi untuk membeli rumah yang middle end, rumah mungil atau sederhana pun tidak menjadi halangan untuk mewujudkan keinginan memiliki rumah. Hampir semua pengembang menawarkan kavling atau produk rumah mungil, karena tingginya kebutuhan masyarakat akan rumah/tempat tinggal, maka hanya dalam waktu singkat mampu terjual ratusan unit rumah. Masalahnya, banyak pengembang memanfaatkan momentum tersebut dengan membangun rumah mungil dengan fasilitas dan lingkungan yang ala kadarnya seperti yang selama ini kita kenal, yaitu Rumah Sangat Sederhana (RSS).

Mendeskripsikan rumah mungil dengan kondisi seperti itu sudah waktunya diubah. Konsumen adalah raja, manusia juga yang selayaknya diberikan yang terbaik. Rumah harus indah, sehat, dan bersahabat dengan lingkungan. Itulah kata kunci membangun rumah ukuran apa pun, termasuk membangun atau memilih rumah mungil. Rumah mungil yang dipasarkan biasanya memiliki luas maksimal 100 meter persegi dengan ukuran variasi 6 X 15 m, 7 X 15m, atau 8 X 12 m, dan bentuk bangunan rumah standar.

source : www.architectaria.com

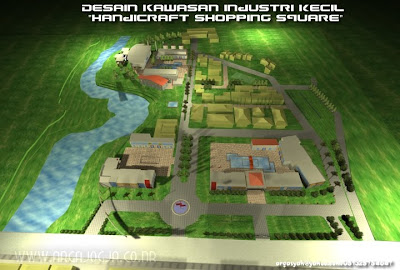
Desain Kawasan Industri Kecil Handicraft Shopping Square

Desain Kawasan Industri Kecil Handicraft Shopping Square

Handicraft Shopping Square adalah tempat pemasaran produk handicraft secara konvensional dan modern [trade] untuk mengakomodasi perkembangan handicraft yang memiliki prospek cerah sekaligus menciptakan ruang terbuka perkotaan sebagai ruang publik yang bersifat rekreatif, atraktif, dan aksesibel.


Desain Kawasan Industri Kecil Handicraft Shopping Square

Konsep kawasan secara makro merupakan pusat perdagangan handicraft untuk kebutuhan domestik maupun ekspor dan menjadi salah satu tempat wisata alternatif yang menawarkan produk kerajinan, sekaligus sebagai fasilitas rekreasi yang berorientasi pada ketersediaan ruang-ruang terbuka publik, sedangkan untuk konsep kawasan secra messo berarti menjadi fasilitas komersial yang mendukung peruntukan lahan sebagai kawasan strategis bagi sektor perdagangan dan akomodasi kepariwisataan. Adapun konsep kawasan secara mikro merupakan penataan kawasan yang berkarakter kreatif, atraktif, komunikatif dan rekreatif yang diperkuat dengan pola sirkulasi dan ruang terbuka [square] yang dinamis, serta kontekstual terhadap kondisi eksisting site

Desain Kawasan Industri Kecil Handicraft Shopping Square

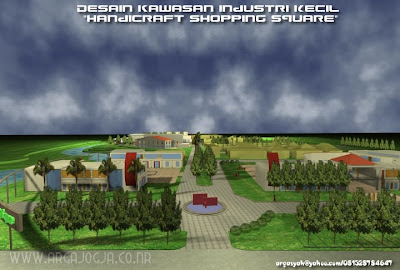
Handicraft Shopping Square didesain dengan konsep ruang terbuka rekreatif, dinamis, atraktif, dan memorable, hal ini dimaksudkan agar :
1. mudah dijangkau, tidak eksklusif
2. ruang terbuka merupakan tujuan pembentukan ruang
3. ruang terbuka sebagai ruang interaksi
4. ruang terbuka sebagai ruang transisi
5. penggunaan elemen lanskap arsitektur dan street furniture

Desain Kawasan Industri Kecil Handicraft Shopping Square

Handicraft Shopping Square didesain dengan memperhatikan konsep sirkulasi dan pergerakan
a. pedestrian way : dinamis, nyaman, dan rekreatif
b. pemisahan jalur pejalan kaki dan kendaraan

Desain Kawasan Industri Kecil Handicraft Shopping Square

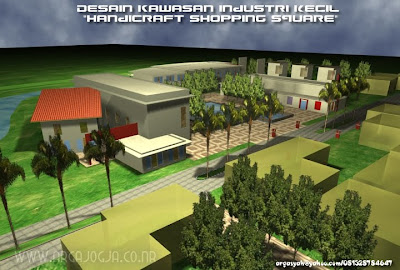
Adapun konsep mengenai penampilan bangunan
a. konsep bentuk [penambahan dan pengurangan bentuk, komposisi tak beraturan dari bentuk-bentuk beraturan, penonjolan massa bangunan sebagai point of interest, orgasisasi cluster dan geometri dengan karakter transparan]
b. konsep tata massa [organisasi cluster membentuk pola square, perletakan massa bangunan sebagai transformasi bentuk geometri dengan penambahan dan pengurangan]
c. konsep fasade bangunan [skala bangunan dan orientasi bangunan selaras dengan komposisi bangunan sekitar, maksimal dua lantai, bentukan kontras dengan eksisting namun tetap mencirikan arsitektur lokal melalui penggunaan material lokal dan komposisi sederhana
d. entrance menjadi focal point berciri arsitektur lokal melalui pemilihan material, vegetasi, penggunaan elemen air.


Desain Kawasan Industri Kecil Handicraft Shopping Square


Pemodelan by Danang, Konsep by Ijun (Tim Argajogja)

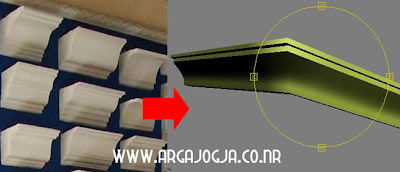
Tutorial Cara Membuat List Profil Gypsum Pada Program 3 Ds Max

tutorial 3ds max
Sesuai karo judul diatas, saiki tak ajari cara membuat list profil gypsum pada program 3ds max. Biasane objek list profil ini banyak digunakan untuk mempercantik berbagai desain objek-objek 3d. Kalo pada desain furniture terdapat pada sisi-sisi lemari atau cabinet, kalo pada interior bisa digunakan pada desain tepi plafon atau desain plafonnya itu sendiri, kalo pada desain rumah biasanya terdapat pada bagian sisi atap, yakni untuk menutupi atapnya. Monggo langsung praktek mawon rasa banyak tanya... sip...

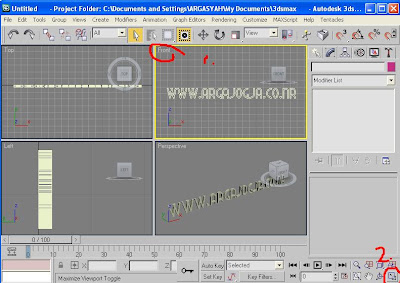
1. Tampilkan viewport dalam tampak front view yang besar , pilih front view lalu klik tolbar kanan bawah pojok (lihat gambar dibawah)

tutorial 3ds max

2. klik tolbar create, lalu shape, lalu line, kemudian klik titik (tekan tombol shift di keyboard agar garisnya lurus) 4,5,6,7,8,9,10,11, lalu klik titik 4, akan muncul kotak dialog spline, klik tombol yes (lihat gambar dibawah)


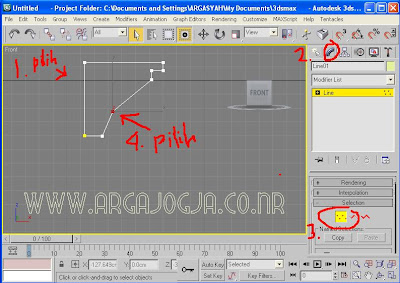
tutorial 3ds max 3. pastikan objek line emasih terpilih, lalu tekan modify (no 2), lalu aktifkan tombol vertex (no 3), lalu pilih vertex (no 4) (lihat gambar dibawah)

tutorial-3dsmax 4. Kemudian klik kanan pada vertex no 4 diatas, pilih smooth, ini berfungsi untuk melengkungkan vertex (lihat gambar dibawah)


tutorial-3dsmax 5. Buat objek lintasan dengan line, cara nya sama seperti langkan no 2 diatas, kemudian pilih objek line yang telah dibuat, lalu klik tolbar create (no 2), lalu klik geometri (no 3) lalu kik pada standar primitive pilih compound (no4)( (lihat gambar dibawah)


tutorial-3dsmax 6 pastikan standar primitive telah berubah menjadi compound (no1) lalu klik toolbar Loft (no2) lalu klik tombol get shape (no3) lalu pilih objek profil yang telah dibuat (no4)


tutorial-3dsmax 7. jika benar dalam perpektif view akan tampak seperti gambar dibawah


tutorial-3dsmax 8. Rampung

Desain Interior Mushola Mungil Minimalist

Desain Interior Mushola Mungil Minimalist
(klik pada gambar untuk memperbesar)


Beribadah kepada Allah Subhanahu wata'ala merupakan kebutuhan setiap muslim, maka penting bagi setiap muslim untuk memperhatikan tempat dimana mereka beribadah kepada-NYA. Sebuah contoh desain interior tempat ibadah mushola mungil, dengan memanfaatkan sudut ruangan yang ada, pemilihan warna didominasi dengan warna hijau, dekorasi putih pada dinding depan menggunakan gypsum, ditambah lukisan kaligrafi bertuliskan "Bismillahirrohmaanirrohim" (Dengan Menyebut Nama Allah Yang Maha Pengasih Lagi Maha Penyayang), ditambahkan pula lemari pendek minimalis untuk menempatkan buku dan bunga, serta terdapat pula sajadah cantik yang tersusun rapi menjadikan tampilan desain interior mushola ini penuh dengan rasa khitmad.

Tutorial Pembuatan Rumah Dengan Sketch Up dan 3Ds Max Vray Bag. 2

Tutorial Pembuatan Rumah Dengan Sketch Up dan 3Ds Max Vray Bag. 2
Setelah beberapa waktu yang lalu tak posting artikel Tutorial Pembuatan Rumah Dengan Sketch Up dan 3Ds Max Vray Bag. 1 saiki tak posting yang bagian ke 2 nya, monggo langsung tancap...

I finally found the time to finish part 2 of Making of ‘MS House’ at dusk, Part 1. This time I’ll cover topics starting from the export of the SketchUP 3d model and up to the final render & post-production. Autodesk released the SketchUP Importer for 3D Studio Max 2010 which allows for a new and probably better importing of the SketchUP model then the 3DS format use described in this article. Next time I’ll keep post parts a week apart at most.
More than a ‘HOW-TO’ but not really qualifying as a fully-fledged tutorial, a ‘MAKING-OF’ post is a collection of spotlights illuminating several different aspects involving in the creation of the subject scene. Hopefully, the information I’m sharing here will be useful for all of you 3d visualization artists, architects, designers and anyone else with an interest in 3d architectural visualization.

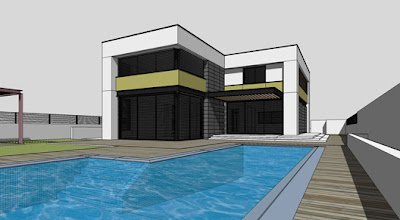
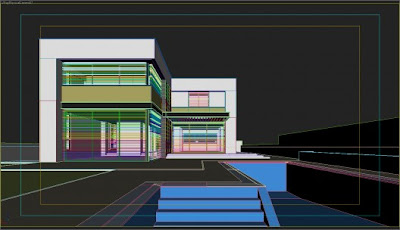
We finished part 1 of this making-of with the view of the complete model ready for export as you can see in the image below.
Tutorial Pembuatan Rumah Dengan Sketch Up dan 3Ds Max Vray Bag. 2

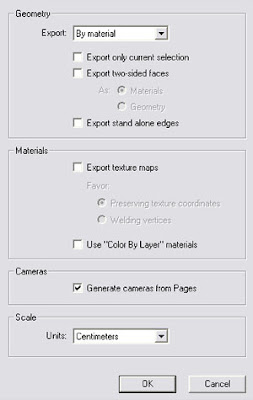
My preferred method of exporting the SketchUP model to 3D Studio Max is using the 3DS file format. In the 3DS Export Options Geometry tab you can choose the method of transport :
* Full hierarchy
* By layer
* By material
* Single object

Tutorial Pembuatan Rumah Dengan Sketch Up dan 3Ds Max Vray Bag. 2
Normally when first exporting the model I would use the by material option. This way I don’t get Multi/Sub-Object materials in 3dsmax and have better control in choosing and editing materials. You can still pick each element in the model regardless, the by material export method doesn’t fuse / weld all the same material geometry together.

For subsequent model updates I would check the Export only current selection after I make sure only the parts I need to re-export are selected. For this I would sometimes use the Single object option, just to make things simpler if the new addition only uses one material for example.

On the first export I also check Generate cameras from pages and I don’t mess with the material options really. Since I tend to model all things as they are in real life I wouldn’t get 2-sided material faces and wouldn’t have any edges to export too (sometimes it is real easy and fast to represent rails with just edges, but before export I add thickness to them).

I also do not use the Export texture maps option, I handle this part in 3D Studio Max, though the assignment and positioning of textures in SketchUP does transfer even without checking this option (after you apply the texture in max you will see the mapping is the same as it was in SketchUP if you use the same proportion image).

Tutorial Pembuatan Rumah Dengan Sketch Up dan 3Ds Max Vray Bag. 2

I’ve created a new 3dsmax file and imported the 3DS file exported from SketchUP into it using the default settings. After that I usually run the VRay Scene Converter from the quad menu just to start with all materials set to V-Ray. I also take the time to pick materials and assign related geometry to layers such as window glass, pool water, house walls, etc. I don’t change the material names yet, since i know I’ll probably re-export some parts and would like them to keep the same material by using the use scene material option when merging them in. All future imports to the work file will start by importing the 3ds file into a clean new 3dsmax file first and then merged into the work file. I find this method is keeping me out of many troubles.
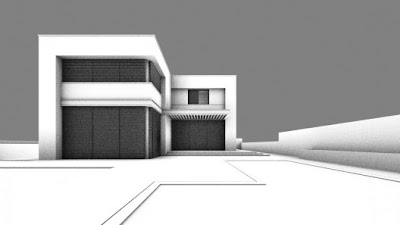
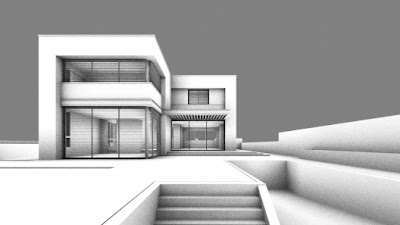
Initial ambient occlusion render

I’ve integrated this render method, as described in the post about Using VRayLightMtl + VRayDirt for Quick AO Render Checkup, into my work-flow after reading a tutorial by Gus Capote form Preconstruct in the 101 issue of 3D World Magazine. I love to use this method while I explore the scene for camera placements and blocking out additional geometry. This way i keep my focus and don’t bother myself with lighting and materials other then turning glass elements on / off to see how the scene look with and without it.
Tutorial Pembuatan Rumah Dengan Sketch Up dan 3Ds Max Vray Bag. 2


Tutorial Pembuatan Rumah Dengan Sketch Up dan 3Ds Max Vray Bag. 2

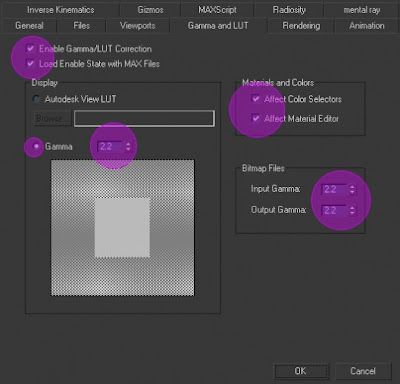
I use LWF for almost all my work. You can find a great explanation about this in the following links :

* Linear workflow ‘reloaded’ by Gijs de Zwart
* Linear workflow in 3DSMax and VRay

I’ll just show how I set it up hare and mention that I burn the 2.2 gamma into the image. While this is not considered the proper LWF method it works fine for most of what I do.

Tutorial Pembuatan Rumah Dengan Sketch Up dan 3Ds Max Vray Bag. 2

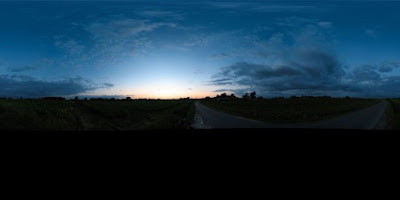
For lighting this scene I use an image created by Valentijn Kint, you can find his great sky images here. I place this texture in the environment slot of the 3dsmax Environment and Effects options dialog

Tutorial Pembuatan Rumah Dengan Sketch Up dan 3Ds Max Vray Bag. 2
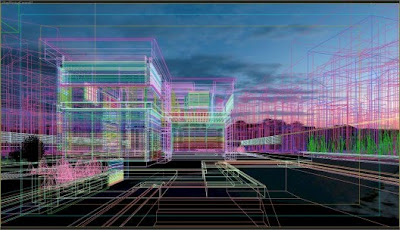
I use the image as is, and just offset it so that the bright area will show on the right side of the image. behind the tree line. I enable view of the background image in the viewport so that it will be easy to set it up the best way. As a general rule i strive to achieve a wide range of colors and brightness levels in the background adding to the image impact. This kind of backlit situation plays rather well with interior lights and i prefer this over pure night shots.
V-Ray physical camera settings

I’m using a VRayPhysical camera to render this scene, with settings as listed below. I try to use real camera values since I can relate to that (The ones you can actually dial in on a camera). I normally start with pure white for the white balance and change as i need along the way – for this image i didn’t, all the tone mapping was done in post later.

* Focal Length = 20mm
* Shutter Speed = 1/60
* F-Number = 2.8
* Film Speed (ISO) = 200
* White Balance = 255, 255, 255
* Vertical Shift Correction = On
* Vignetting = Off

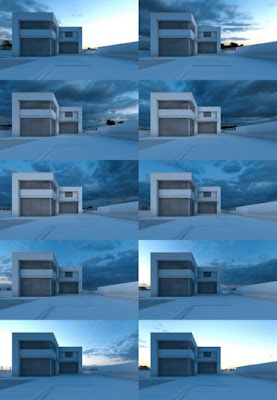
Before choosing the final settings for the background image and camera I rendered a set of 10 images, with an override material applied, offsetting the background by 0.1 each time. Today it’s possible to do with V-Ray RT without any test renders, just change it and see it on the fly!

Tutorial Pembuatan Rumah Dengan Sketch Up dan 3Ds Max Vray Bag. 2

After setting the desired background offset I test the scene using slightly better render settings with and without the window glass and pool water, and also test it with them but apply a 100% reflecting materials to those elements to get a feel of how the maximum reflection looks. I f i need to tweak the background a little to show better reflection too this is the stage i do it in. After that I quickly tested the scene with glass and water elements turned on and excluded from the general scene material override..

Tutorial Pembuatan Rumah Dengan Sketch Up dan 3Ds Max Vray Bag. 2
I’ll focus now on some of the more dominant materials in the scene, elaborating a little about the textures and settings i used for the windows glass, pool water, pool tiles, wood deck, wall plaster and grass

Window glass Material

Tutorial Pembuatan Rumah Dengan Sketch Up dan 3Ds Max Vray Bag. 2

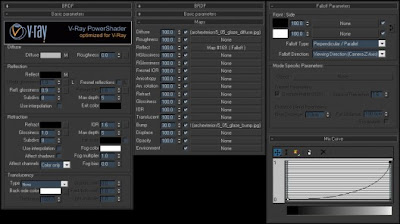
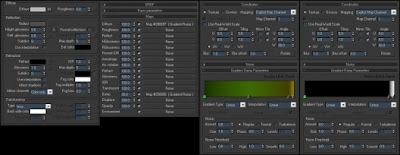
For the glass I’ve set the diffuse slot to pure black. Reflection assigned a falloff map set to Perpendicular / Parallel and edited the mix curve so that its not pure black and white at the edges, this way it will never fully reflect or refract. Retraction set to pure white with IOR set to 1.545 and a standard noise map for bump set to 1% to imitate real life glass distortion.

Pool water material

Tutorial Pembuatan Rumah Dengan Sketch Up dan 3Ds Max Vray Bag. 2

The water material is tricky since it’s really a combination of the pool surface and water that creates the final effect. As the glass the diffuse here is also pure black. Reflection set to RGB 185,185,185 with Fresnel turned on, IOR set to 1.333. Refraction set to RGB 240,240,240 with Fog color of RGB 60,240,225 and a multiplier of 0.02. A a standard noise map assigned to the bump slot at 8% to recreate the water surface.

Pool tiles

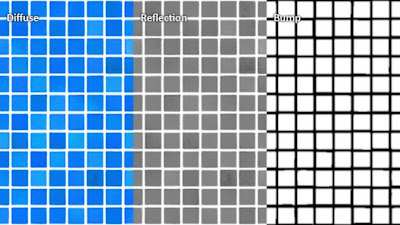
The pool tile is a combination of maps i got from one of the evermotion packs. It uses 3 images for the diffuse, bump and reflection map slots.

Tutorial Pembuatan Rumah Dengan Sketch Up dan 3Ds Max Vray Bag. 2

Wood decking material
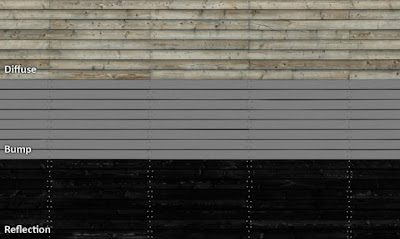
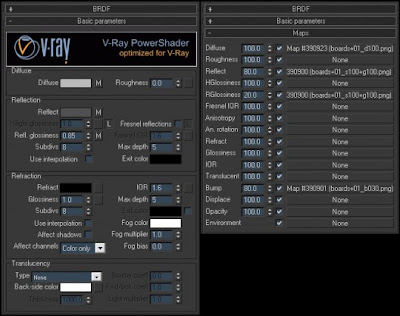
For the wood deck I’ve used Arroway’s boards+01 texture form their general texture pack.

Tutorial Pembuatan Rumah Dengan Sketch Up dan 3Ds Max Vray Bag. 2

Grass material

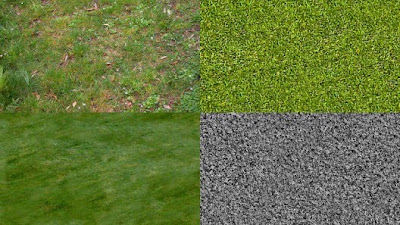
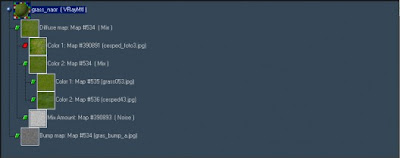
I picked up this grass material from evermotion forum after a kind user shared it, I can’t remember who it was though (if you do, please mention this in a comment below). It is a mix of 3 grass diffuse texture and a grayscale texture for the V-Ray displacement
Tutorial Pembuatan Rumah Dengan Sketch Up dan 3Ds Max Vray Bag. 2

Bamboo like plant

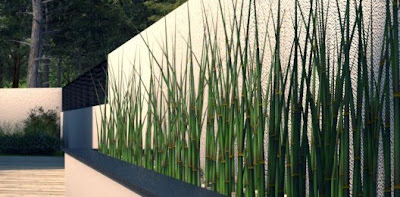
I used the advanced painter script to paint grassStrands and assign this material on them to look more like a bamboo type plant. The effect is great from mid to far camera placement. Near shots may not look that great with this setup.
Tutorial Pembuatan Rumah Dengan Sketch Up dan 3Ds Max Vray Bag. 2

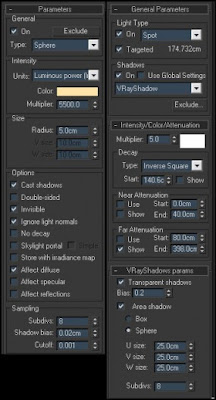
Inside the house i placed several VRayLights near the ceilings with a little bit of orange in the color slot. For the pool i decided to go with standard spot lights so i can have more control over the direction and spread of light inside and outside of the pool. Here are the settings for both the VRayLights and Spot Lights.

Tutorial Pembuatan Rumah Dengan Sketch Up dan 3Ds Max Vray Bag. 2

The vegetation in this scene is a combination of Onyx, XFrog and Evermotion models placed either manually or scattered using VRayScatter. The background trees are made out of two VRayScatter objects, each with a different tree (An onyx custom broad leaf and XFrog conifer). Both materials were tweaked to use the VRayScatterMap to allow for leaf color variations between tree instances.

Tutorial Pembuatan Rumah Dengan Sketch Up dan 3Ds Max Vray Bag. 2

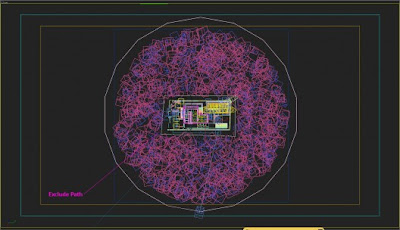
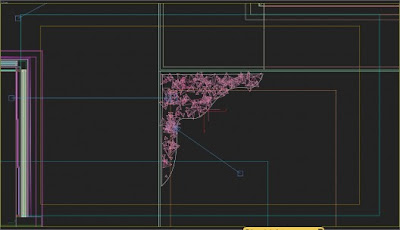
The small areas of shrubs were define by drawing a line shape that was then converted to poly to become the distribution geometry for the VRayScatter object (the poly object was set to not render).

Tutorial Pembuatan Rumah Dengan Sketch Up dan 3Ds Max VrayBag. 2

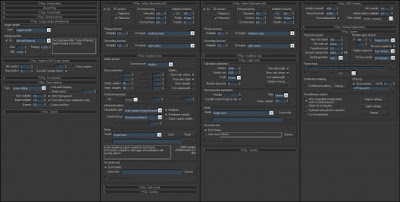
Render settings are rather simple and actually weren’t optimized that much. You can see them all in the image below.

Tutorial Pembuatan Rumah Dengan Sketch Up dan 3Ds Max Vray Bag. 2

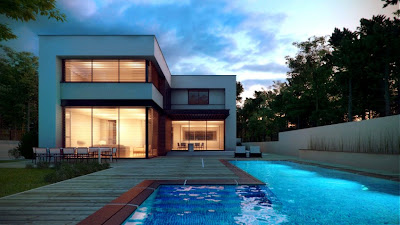
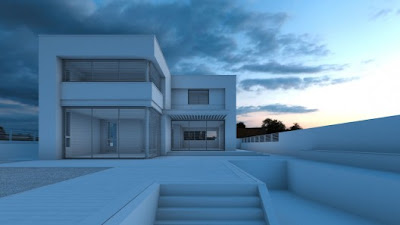
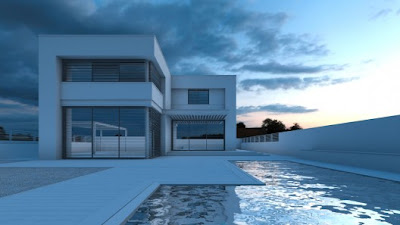
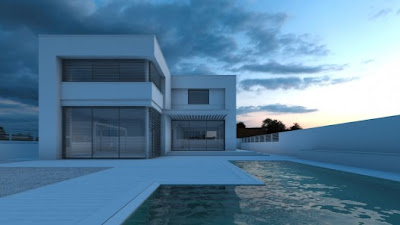
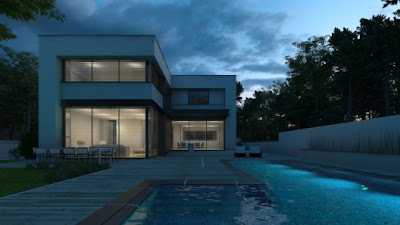
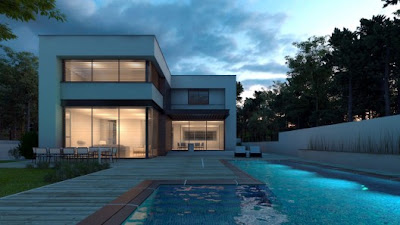
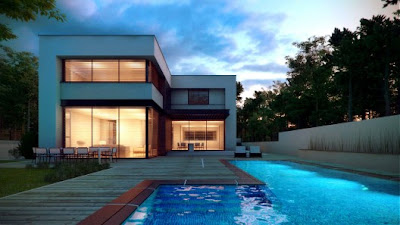
The initial render was not a good sight, but i was planning on doing most of the tuning in post. I’ve done some general color and level corrections and also specific tweaks to the pool area, window glow and trees in the background until i was feeling good about the atmosphere. below you can see the initial image, mid process image and final result.

Tutorial Pembuatan Rumah Dengan Sketch Up dan 3Ds Max Vray Bag. 2
Source : www.ronenbekerman.com
Desain Interior Warnet Ukuran 7,5 x 8 meter

Desain Interior Warnet Ukuran 7,5 x  8 meter
Setelah kemarin tak posting desain fasad eksteriore.., saiki tak posting interiore, ben komplit, lagiankan kurang sip nek ming ketok luarnya tok, dalamnya juga iya kan (masak koe mau, beli kucing ning dalam tas kresek.., he3x..)
Desain interior ini terdiri dari 16 bilik warnet plus 1 kasir dengan masing-masing bilik berukuran 1,2x1,3, terdapat ruang tunggu didepan pintu masuk dan terdapat juga satu buah kamar mandi yang terletak dipojok dan didepan pintu masuk kamar mandi dibuat wastafel dan diberi cermin agar pas keluar dari kamar mandi kita bisa ngilo disek.., (ben keliatan gantengnya gitu lo.. he3x) . Kamar mandi berukuran 1,2x1,3 meter. Desain interior warnet ini didesain pada ruangan yang tertutup sehingga diberikan AC pada ruangan ini.